Table of Contents >> Show >> Hide
- Why Printing on Note Cards Is Weirdly Tricky
- Way 1: Print on Note Cards with Microsoft Word on PC or Mac
- Way 2: Print on Note Cards with Apple Pages on Mac
- Way 3: Use Avery, Canva, or a PDF Workflow on PC or Mac
- Common Problems and How to Fix Them
- Which Method Should You Choose?
- Real-World Experience: What Printing Note Cards Actually Teaches You
- Conclusion
Printing on note cards sounds like one of those tasks that should take five minutes. Open a file, hit Print, bask in your own efficiency, done. In reality, it often turns into a tiny office drama starring crooked margins, a printer that suddenly “doesn’t support that media,” and one brave card stock sheet that disappears into the tray never to be seen again. The good news is that printing note cards on a PC or Mac is absolutely doable once you know which workflow fits your setup.
Whether you are making study cards, recipe cards, thank-you notes, event cards, or tidy little business handouts, the trick is simple: match your document size to your actual card size, pick the right template or custom paper settings, and tell your printer the truth about the paper you are feeding it. No bluffing. Printers can smell fear.
In this guide, you will learn three practical ways to print on note cards on PC or Mac. We will cover Microsoft Word, Apple Pages, and an easy template-and-PDF method that works across both platforms. Along the way, we will also tackle common printing disasters, show you when to use card stock settings, and explain how to avoid the classic “Why is my text floating in the top-left corner like it pays no rent?” problem.
Why Printing on Note Cards Is Weirdly Tricky
Before jumping into the methods, it helps to understand why this project can go sideways so quickly. A printer does not just care about what is on the page. It also cares about the size of the page, the type of paper, the path the sheet takes through the machine, and whether the print dialog is secretly scaling your design behind your back.
That means successful note card printing usually comes down to four rules:
- Set the document to the same size as the card or template you are printing on.
- Choose the correct product template if you are using pre-perforated sheets.
- Use the printer’s card stock, thick paper, or specialty media setting when needed.
- Test on plain paper first before sacrificing your good note cards to the printer gods.
Get those four things right, and you are already ahead of half the internet.
Way 1: Print on Note Cards with Microsoft Word on PC or Mac
If you already have Word, this is the most familiar route. It is ideal for people who want simple text-heavy cards, flashcards, recipe cards, or printable note cards using either custom sizes or template-based sheets.
When Word Is the Best Choice
Use Word when you want a straightforward document editor, need quick formatting tools, or plan to print on standard note card products such as 3 x 5 index cards, 4 x 6 cards, or folded card sheets. Word is especially handy if you are using Avery-compatible products or building a reusable card layout for future projects.
How to Set It Up
Start by deciding whether you are printing on individual note cards or pre-perforated sheets. That choice determines your setup.
For individual cards: create a document sized to match the card. If your card is 4 x 6 inches, your page should also be 4 x 6 inches. If it is 3 x 5, set the page to 3 x 5. Keep margins modest so your content stays printable, and center important text rather than pushing it too close to the edge.
For template sheets: search Word’s template options or use an Avery-compatible template. This is the easiest way to print multiple cards on one letter-size sheet. If the product number matches your stock, alignment is usually much better than trying to fake it with a table and a prayer.
Best Practices in Word
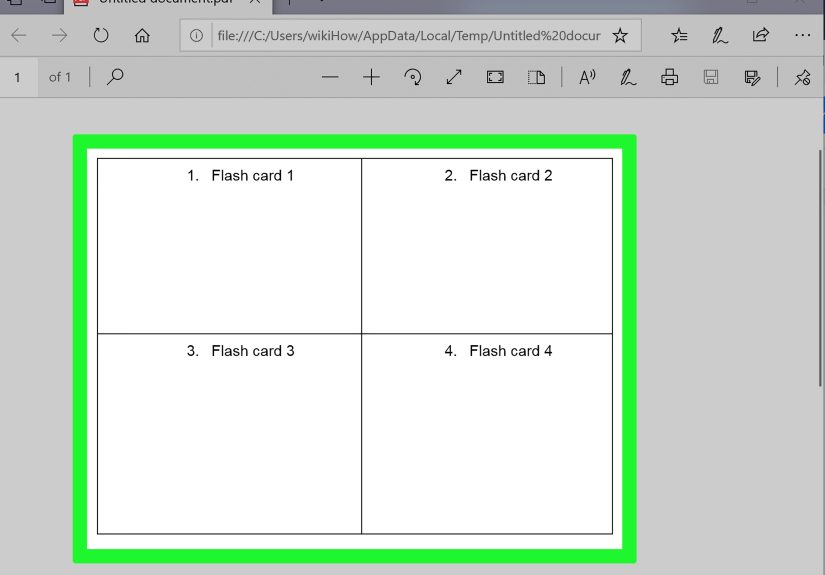
Keep the design clean. Note cards are small, so giant paragraphs tend to look like a bad life choice. Use short headings, readable fonts, and generous white space. If you are printing study cards, place the term or question prominently. If you are printing recipe cards, use bold labels like Ingredients and Instructions. If you are printing thank-you cards, remember that elegance beats crowding every square inch with decorative flourishes.
On Mac, Word users may need to create or manage a custom paper size through page setup options if the preset size is not available. On Windows, many printers also allow custom sizes through printer properties. Either way, the big idea is the same: your document size and your print size must agree like old friends, not argue like siblings in a road trip.
How to Print Without Ruining the Cards
When you open the print dialog, slow down. This is the moment where most good intentions go to die.
- Verify that the selected paper size matches the card or template sheet.
- Choose the correct media type, such as card stock, thick paper, or specialty paper, if your printer offers it.
- If the cards are heavier than plain paper, use the manual feed slot or rear tray if your printer supports one.
- Print one test page first on plain paper and hold it against the actual card stock to check alignment.
If the layout prints too small or shifts off-center, scaling is usually the culprit. Turn off anything that says Fit to Page unless you specifically need it. For note cards, “helpful” automatic scaling often behaves like an overconfident intern.
Way 2: Print on Note Cards with Apple Pages on Mac
If you are on a Mac and prefer a clean, uncluttered workspace, Pages is a strong choice. It handles custom paper sizes well, and it is especially useful for single note cards, invitation-style cards, and simple custom layouts.
Why Pages Works So Well for Mac Users
Pages lets you define a custom paper size and then print using that exact size. This is incredibly useful if your note cards are not standard letter paper or if you are feeding unusual sizes through a printer that supports them. It also feels a little less like wrestling a spreadsheet in a tuxedo than some other apps do.
How to Create a Custom Note Card in Pages
Open a new Pages document and go to the document or page setup controls. From there, choose your paper size. If your exact size is not listed, create a custom size and name it something obvious, such as “Recipe Card 4×6” or “Study Card 3×5.” Future You will appreciate the organization.
Once your page size is set, format the card like any other small document. For a single-sided note card, keep the design tight and readable. For a folded card, think in panels. The front should be visually simple, the inside should carry the message, and the back can stay minimal unless you enjoy turning note cards into novels.
Printing Tips for Pages
The most important thing on a Mac is to check both the document size and the printer’s selected paper size in the print dialog. These should match. If they do not, your printer may scale, crop, or position the content incorrectly.
Also pay attention to the printable area. Some printers cannot print edge to edge on heavier stock, so leave a little breathing room unless your printer explicitly supports borderless printing on that media. If your note card design needs clean trim lines or precise edges, export to PDF first and inspect the file before printing.
For heavier cards, feed one sheet at a time and choose the closest thick-paper or card-stock setting your printer offers. Pages can set you up for success, but it cannot physically drag warped card stock through rollers. That part is still very much your printer’s personality problem.
Way 3: Use Avery, Canva, or a PDF Workflow on PC or Mac
If you want the easiest cross-platform method, this is it. It works especially well when you are printing on branded note card sheets, index card products, or custom-designed cards that you want to control more precisely.
Who Should Use This Method
This workflow is perfect for people who want visual templates, easier drag-and-drop design tools, or a more reliable way to print multiple cards per page. It is also helpful if Word or Pages keeps fighting you on alignment.
How the Template-and-PDF Workflow Works
First, choose the exact note card product or size. For example, some common options include 3 x 5 index card sheets, 4 x 6 card sheets, and 4.25 x 5.5 note cards. If you are using Avery or a compatible brand, pick the matching template number. This matters more than people expect. “Close enough” is often how you end up printing half a heading onto the perforation line.
Next, design the card in Avery Design & Print, Canva, or another layout tool that lets you export a print-ready PDF. If you use Canva, download in PDF Print format. If the design goes to the edge, enable crop marks and bleed so the file is more print-friendly.
Then open the exported PDF in a proper PDF viewer and print carefully. In the print settings, look for options such as Actual Size, Fit, or Shrink Oversized Pages. For note cards, Actual Size is often the safest bet when the template is already built to the correct dimensions. If you choose Fit, your card may print slightly off-size and drift out of alignment.
Why This Method Is So Popular
It reduces layout guesswork. Instead of manually building columns, measuring margins, and trying to convince a word processor to behave like a design program, you begin with a template designed for the exact card stock. That saves time, paper, and emotional stability.
It is also flexible. You can create thank-you cards with photos, study cards with color coding, minimalist business inserts, menu cards, place cards, or event stationery. If your goal is a polished visual result rather than a basic typed card, this method usually wins.
Common Problems and How to Fix Them
The Printer Will Not Feed the Card Stock
Try the manual feed slot or rear tray. Many printers handle thicker media more reliably when the paper path is straighter. Load one sheet at a time, adjust the paper guides snugly, and avoid overstuffing the tray like you are packing for a six-month vacation.
The Print Is Off-Center
Check three things: template number, page size, and scaling. Off-center output usually means one of them is wrong. Print a test on plain paper first and compare it to the actual note card sheet before running a full batch.
The Ink Smudges or Looks Too Wet
Make sure you selected the correct paper type in the printer settings. Printers use media settings to adjust ink usage and feed behavior. If you tell the printer it is plain paper when it is actually glossy or heavy stock, the result may look messy.
The Card Prints Tiny or Cropped
This is almost always a scaling issue. In your print dialog or PDF viewer, choose the setting that preserves the original dimensions. Tiny output and accidental cropping are the classic fingerprints of a print dialog trying to be “smart.”
Which Method Should You Choose?
Choose Word if you want a familiar editor, simple layouts, and the option to work with templates or custom sizes.
Choose Pages if you are on a Mac and want a clean interface with solid custom paper-size support.
Choose Avery, Canva, or a PDF workflow if you want polished designs, exact product templates, and better control over print-ready files.
In other words, use the tool that matches your goal. For quick study cards, Word is excellent. For a custom Mac setup, Pages feels natural. For event cards or anything that needs to look professionally designed, templates and PDF printing are usually the smoothest route.
Real-World Experience: What Printing Note Cards Actually Teaches You
Here is the funny thing about printing note cards on a PC or Mac: once you do it a few times, you stop treating it like a tiny technical chore and start seeing it as a small design project with a paper path. That sounds dramatic, but it is true. The first time most people print note cards, they assume the only job is typing words and pressing Print. The second time, they realize paper size matters. By the third time, they become the kind of person who says things like, “Hang on, I need to check the media setting,” and somehow that becomes normal.
In practice, the best experiences usually come from slowing down for two extra minutes before printing. The people who get the cleanest results are not necessarily the most technical. They are just the ones who check the card dimensions, preview the layout, and run a plain-paper test first. That tiny bit of patience saves an absurd amount of frustration. It is the difference between feeling organized and feeling personally betrayed by office equipment.
Another real-world lesson is that note cards make you care about details you would ignore on a full-size document. On a regular sheet of paper, a slightly awkward margin is not the end of the world. On a 3 x 5 or 4 x 6 card, every design choice becomes louder. Font size matters more. Line spacing matters more. Even one extra sentence can make the card feel crowded. That is why the best note cards tend to be simple, clear, and visually calm. Small format forces good editing, which is honestly a useful life skill.
There is also a practical satisfaction to getting the workflow right. Once you build one good template for recipe cards, revision cards, business inserts, or thank-you notes, you can reuse it again and again. That turns a one-time annoyance into a repeatable system. A student can print consistent study cards. A home cook can make a full box of recipe cards that actually match. A small business owner can print polished inserts without paying for a full custom print run every time. Suddenly the process is not just “Can I print on note cards?” It becomes “Great, now I have a system.”
And perhaps the most honest experience-related takeaway is this: printers are still printers. Even with the right software, the right template, and the right card stock, one machine may love thick paper while another acts like you fed it plywood. That is not always your fault. Some trial and error is normal. What matters is knowing where to look when something goes wrong. If the feed fails, check the tray and paper path. If the alignment is off, check size and scaling. If the print looks muddy, check media type. The mystery disappears once you know the usual suspects.
So yes, printing note cards on a PC or Mac can be a little fussy. But it is also one of those surprisingly useful skills that pays off in school, work, events, crafts, and everyday organization. Once you learn the rhythm of templates, paper sizes, and printer settings, it becomes far less intimidating. You stop wasting card stock, stop arguing with print dialogs, and start producing note cards that look intentional. And that, in the glamorous world of home printing, counts as a serious victory.
Conclusion
If you want to print on note cards on PC or Mac without turning your desk into a paper graveyard, the formula is simple: choose the right method, match the card size exactly, use the correct media settings, and always test before committing your favorite stack of stationery. Word is great for straightforward layouts, Pages is excellent for Mac users who want custom sizing, and the Avery-or-PDF route is the easiest path to polished, template-based results.
Once you understand how paper size, templates, and printer settings work together, printing note cards stops feeling mysterious. It becomes a repeatable workflow. And that means fewer jams, fewer alignment disasters, and far more useful little cards in your hands.