Table of Contents >> Show >> Hide
- Start With Your Space (Not Your Shopping Cart)
- The Barre: Wall-Mounted vs. Portable (Choose Your Personality)
- Barre Height: “Hip Height” Is a Great Start (Then Personalize)
- Mirrors Without the Drama (Because Form Feedback Matters)
- Flooring That Won’t Betray Your Ankles
- Lighting, Sound, and Air: The “I’ll Actually Use This” Trifecta
- Equipment Essentials (and the Fun Extras)
- Budget Tiers: Three Ways to Build This
- Installation & Safety Checklist (Please Read This Part)
- Sample Layouts for Real Homes
- Care & Cleaning (Because Sweat Is Honest)
- Common Mistakes (So You Don’t Have to Learn the Hard Way)
- Conclusion
- Experiences: What It’s Like to Build Your Own Barre Studio (The Part Nobody Mentions)
You don’t need a boutique membership, a marble water bar, or a front-desk person named “Sky” who hands you eucalyptus towels
like they’re sacred scrolls. You just need a smart setup: a safe barre, a little open space, the right floor under your feet,
and enough mirror coverage to catch that “wait… is my hip doing that?” moment.
This guide walks you through building a home barre studio that feels legitwhether you’re converting a spare bedroom,
claiming a corner of your living room, or turning your garage into a place where you do tiny pulses while questioning all
your life choices (in a good way). We’ll cover layout, barre types, mounting basics, mirror and flooring options, budgets,
and the small details that make you actually use the space.
Start With Your Space (Not Your Shopping Cart)
The fastest way to build a home barre studio you love is to design it around movement, not merchandise. Barre workouts may be
“small movements,” but your body still needs room to step, hinge, extend, and rotate without punting a houseplant into orbit.
The “movement bubble” measurement
A simple rule: aim for a clear area around 8 feet by 8 feet if you can. That size supports arm extension,
lateral steps, and floor work without constant furniture negotiations. If you’re in a smaller space, you can still make it work
you’ll just want a more minimal layout and maybe a portable barre you can shift when needed.
Pick a location that makes barre feel easy
- Spare bedroom: Best “studio vibe,” easiest for mirrors and wall mounting.
- Living room wall: Surprisingly great if you keep the setup clean and attractive.
- Garage: Plenty of space, but plan for ventilation, temperature swings, and durable flooring.
- Apartment corner: Works best with a portable barre and a clean storage system.
Quick sanity check: if setting up your studio takes more than two minutes, your brain will start negotiating:
“Or… we could just not.” The best home studios are the ones that are friction-free.
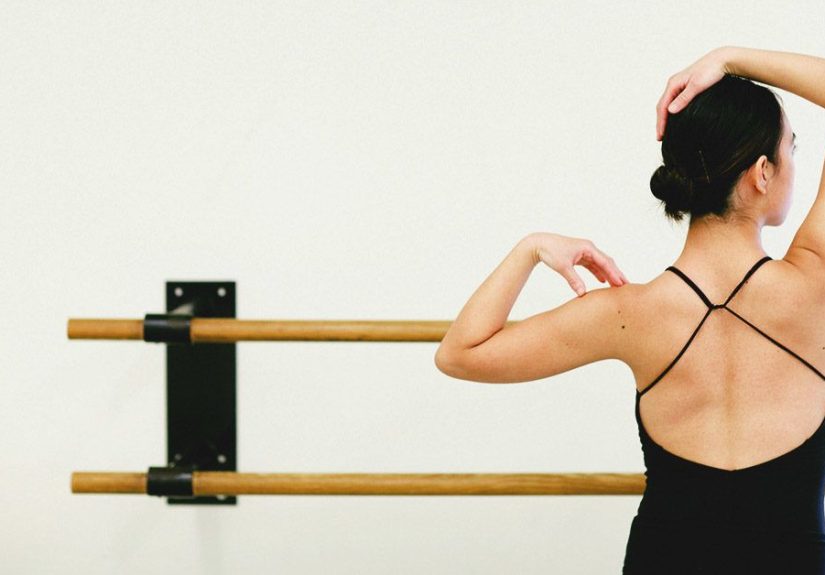
The Barre: Wall-Mounted vs. Portable (Choose Your Personality)
Your barre is the centerpiece. It’s also the thing you’ll lean on, pull against, and occasionally glare at during isometric holds.
Choosing the right type matters for both safety and enjoyment.
Wall-mounted barres (most stable, most “real studio”)
A properly installed wall-mounted barre feels amazing. No wobble. No scooting. Just solid support. The big requirement:
it must be mounted into something strong (typically studs, or a properly installed backer board).
-
Stud reality: Many wood-stud walls are spaced about 16 inches on center.
That affects where brackets can go, and why many commercial barres and brackets are designed around that spacing. -
Bracket spacing: Fitness/barre classes often use closer bracket spacing for extra stability
(commonly around 32–48 inches between brackets), while some ballet setups space wider depending on the system. -
Distance from wall: Many barre systems place the barre center roughly 8–9 inches from the wall,
which gives comfortable hand clearance and usable “lean room.”
Bottom line: wall-mounted is the “buy once, love forever” optionif you’re allowed to drill and you’re confident about safe installation.
If not, go portable.
Portable/freestanding barres (flexible, renter-friendly)
Portable barres are great for apartments, shared rooms, and anyone who wants to tuck the studio away when guests visit and pretend the
living room has always been this tidy. Many portable models adjust through a range like 35–45 inches,
so more than one person can use them comfortably.
The tradeoff is stability. The best portable barres are heavy, wide-based, and don’t rock when you shift weight. If the barre is light enough
that a mild breeze could move it, it’s more “decorative handrail” than “training tool.”
Barre Height: “Hip Height” Is a Great Start (Then Personalize)
There isn’t one magical universal barre heightbecause humans are not all the same size, despite what some clothing brands seem to believe.
A common starting point is hip height, often around 36 inches for many adults.
Another practical method: stand tall, bend your arm to about a right angle, and place your hand on an imaginary barre.
Your shoulder should feel relaxed, not shrugged. If your shoulder hikes up toward your ear, the barre may be too high.
If you feel like you’re leaning down and collapsing, it’s likely too low.
When to go higher or lower
- Taller torso / shorter arms: You may prefer a slightly higher barre.
- Barre fitness focus: Slightly lower can work if you do lots of hinge patterns and glute work.
- Multiple users: Adjustable portable barres are a win, or install a second “training rail” at a different height.
Pro tip: if you already attend a studio, measure the barre height you love there. Your body knows what it likeslisten to it.
Mirrors Without the Drama (Because Form Feedback Matters)
Mirrors aren’t vanity; they’re feedback. Barre relies on alignmentribcage stacked over pelvis, knees tracking, hips square,
shoulders down. A mirror helps you catch the subtle stuff before it becomes “why does my lower back feel like it’s filing a complaint?”
Mirror safety: what matters most
For fitness spaces, prioritize safety-backed mirrors (or mirrors with an approved safety film backing) so if they crack,
the glass is far less likely to scatter. Some experts note that tempering mirrors can introduce optical distortion,
so many studios favor quality glass with a safety backing/film to balance clarity and safety.
Where to place mirrors
- Best: On the wall you face most often during standing work.
- Avoid: Directly opposite a bright window (glare city) unless you have shades.
- Good compromise: Two large panels centered at eye level, with a small gap betweeneasier than a full wall install.
If a full mirrored wall isn’t realistic, even a single large, well-placed mirror can improve your trainingespecially for posture and hip alignment.
Flooring That Won’t Betray Your Ankles
Flooring is underrated until your foot slips mid-relevé and you experience a spiritual awakening you didn’t ask for.
Barre needs a surface that supports balance, provides controlled traction, and feels good for repetitive work.
Best flooring options for home barre studios
-
Dance vinyl (“Marley”): Popular in studios because it balances grip and glide. Great for turns and controlled footwork
when installed over a smooth, hard subfloor. - Hardwood or quality laminate: Looks great and works well, especially with a supportive mat for floor sections.
-
Rubber (select areas): Durable and protective for multipurpose spaces. For barre balance work,
choose a surface that doesn’t feel overly “spongy.”
What to avoid (most of the time)
- Thick foam tiles under the barre: Cushy for floor work, but can feel unstable for standing balance.
- Deep carpet: Can torque knees/ankles and makes pivots awkward.
A simple hybrid setup works beautifully: solid floor for standing segments, plus a high-grip mat you roll out for core and stretching.
Lighting, Sound, and Air: The “I’ll Actually Use This” Trifecta
If your studio feels gloomy, echo-y, or stuffy, you’ll avoid it. Not because you’re lazybecause your brain likes comfort and clarity.
Give it a pleasant environment and suddenly you’re the kind of person who “just pops in for a quick 20 minutes.”
Lighting
- Bright and even: Overhead light plus a lamp in the corner beats a single harsh ceiling bulb.
- Mirror-friendly: Position lights so they don’t blast directly into the mirror and bounce glare into your eyeballs.
Sound
A simple Bluetooth speaker is enough. Place it where you can hear clearly without max volume (your future self will appreciate it).
If you follow online classes, test audio and Wi-Fi in the room before you commit to the layout.
Ventilation and comfort
A small fan, decent airflow, and a towel hook are “tiny upgrades” that make your studio feel intentional.
Yes, even a towel hook. You’re building habits, not just decor.
Equipment Essentials (and the Fun Extras)
You can build an excellent barre studio without filling the room with gadgets. Start with the basics, then add what actually supports your practice.
Core essentials
- Barre: wall-mounted or portable, chosen for stability and fit
- Mirror: at least one large mirror for form checks
- Mat: for floor work, stretching, and kneeling exercises
- Light weights: 1–3 lb (or 2–5 lb depending on your programming and joints)
- Resistance bands/loop bands: great for glute activation and added challenge
Nice-to-haves that feel “studio level”
- Mini ball: for inner-thigh and core engagement (and for discovering muscles you didn’t know existed)
- Sliders: for smoother lunges and core work
- Small storage: basket or wall shelf so equipment doesn’t become floor clutter
- Timer clock: visual intervals can be surprisingly motivating
Budget Tiers: Three Ways to Build This
1) The “DIY and Done” setup (roughly $150–$400)
- Portable barre or a carefully installed DIY wall barre
- One large mirror (or two panels)
- Mat + light weights + loop bands
This tier is about function. It’s clean, simple, and effective. Perfect for beginners or anyone building consistency first.
2) The “Feels like a studio” setup (roughly $400–$1,200)
- High-quality wall-mounted barre with solid brackets
- More mirror coverage (wider or taller panels)
- Better flooring solution (dance vinyl or upgraded surface)
- Storage, lighting upgrades, speaker
3) The “I live here now” setup ($1,200+)
- Full mirrored wall with safety backing/film
- Premium barre system (single or double rail)
- Studio-style flooring (and possibly sprung subfloor)
- Dedicated lighting, fan/airflow, and a polished aesthetic
The best budget is the one that doesn’t stress you out. Your studio should reduce friction, not create it.
Installation & Safety Checklist (Please Read This Part)
A barre is not a towel rack. You will lean on it. You will pull against it. You may occasionally make a surprised noise mid-set and
grip it like it’s the last helicopter out of a movie scene. Install accordingly.
Wall-mounted barre safety basics
- Find studs with a stud finder and confirm placement.
- Use appropriate fasteners for your wall type (wood studs, masonry, etc.).
- Follow bracket spacing guidance for your barre length and intended use.
- Level everything before final tightening.
- Test gradually: apply controlled pressure before trusting it fully.
If you’re not confident in wall structure, tools, or fasteners, it’s worth hiring a licensed contractor for installation.
Your wrists, face, and drywall will all be happier.
Sample Layouts for Real Homes
Layout A: Small apartment corner
- Portable barre facing a large mirror
- Mat stored vertically behind a door
- Small basket for bands/weights
- Speaker on a shelf (off the floor to avoid accidental kicks)
Layout B: Spare bedroom studio
- Wall-mounted barre on the longest uninterrupted wall
- Mirror panels centered opposite the barre (or on the same wall if you face it)
- Dance vinyl strip or area rug removal to create a clean training zone
- Ceiling light + corner lamp to reduce shadows
Layout C: Garage multipurpose studio
- Rubber flooring for durability, plus a stable mat for floor work
- Mirror panels mounted away from impact zones
- Fan for airflow and a small shelf for storage
- Portable barre if walls are unfinished or shared with storage systems
Care & Cleaning (Because Sweat Is Honest)
Home studios feel better when they’re cleanand equipment lasts longer. Wipe down high-touch items (weights, bands, barre surface)
and let mats dry fully before storing. A simple “wipe after use, deeper clean weekly” rhythm keeps the space fresh and ready.
Common Mistakes (So You Don’t Have to Learn the Hard Way)
- Going too soft on flooring: Thick foam can feel unstable for balance work.
- Mirror glare: Great mirror placement can be ruined by a single unshaded window.
- Skipping storage: Loose bands on the floor are basically ankle traps.
- Under-building the barre: If it wobbles, it’s not “rustic charm,” it’s a problem.
- Over-buying equipment: Start with essentials, then add what you truly use.
Conclusion
Building your own barre studio is less about creating a perfect “Instagram room” and more about designing a space that makes movement easy.
When your barre is stable, your mirror gives you clear feedback, and your flooring supports balance, your workouts become more consistent
and consistency beats fancy every time.
Start small if you need to. A portable barre, a mirror, and a mat can carry you far. Then upgrade intentionally: better lighting, safer mirrors,
improved flooring, and a setup that matches your real life. The goal isn’t to build a museum. The goal is to build a studio you’ll actually use.
Experiences: What It’s Like to Build Your Own Barre Studio (The Part Nobody Mentions)
If you’ve ever rearranged furniture and thought, “Wow, I’m basically an interior designer now,” building a home barre studio will feel familiar
except your design decisions directly impact how your body feels during calf raises. And that’s where the “experience” part gets interesting.
First, almost everyone underestimates how much they’ll appreciate a dedicated routine. Not a complicated routinejust the comforting simplicity of
walking into a specific spot where your brain immediately switches into “training mode.” People often report that once the barre is visible and ready,
they stop negotiating with themselves. The studio becomes a cue. You see the barre, and you think, “Fine. Ten minutes.” Ten minutes becomes twenty.
Twenty becomes your new baseline. The space does the motivation work for you.
Second, the mirror experience is surprisingly emotional (in the most practical way). At first, a lot of people assume mirrors are about aesthetics.
Then the first time you notice your ribs flaring or your hips twisting during a simple leg lift, you realize it’s about learning. The mirror becomes
your coach that never gets tired, never forgets the cue, and never says, “Good enough” when your alignment is quietly drifting. Over time,
many home-barre builders say they rely less on staring at themselves and more on quick check-inslike a pilot scanning instrumentsthen returning
attention to sensation and control.
Third, the floor will teach you what you like within about three workouts. If the surface is too slick, you’ll feel hesitant and guarded,
especially during transitions and pivots. If it’s too sticky, you’ll notice it in your knees and ankles when you try to rotate or adjust foot position.
If it’s too soft, balance work becomes wobbly in an unhelpful wayyour muscles work harder, but your technique gets noisy. The “right” floor often
feels boring in the best way: stable, predictable, and quietly supportive. People who upgrade their flooring later frequently say it’s the change
that makes the studio feel truly professional.
Fourth, there’s a funny social side effect: once your studio exists, you start protecting it. Clutter piles suddenly feel personallike someone parked
a bicycle in the middle of your yoga mat. Many people end up creating a small end-of-day reset: weights back in the basket, bands hung neatly,
mat rolled, towel tossed in the laundry. It becomes a micro-ritual that keeps the room usable and makes the next workout easier. And because barre
is repetitive by design, the “tiny reset” habit fits the whole vibe: small actions, big payoff.
Finally, the best experience people describe is confidencespecifically the quiet confidence that comes from practicing consistently in a space that
supports good form. When your setup is right, you don’t feel like you’re improvising. You feel like you’re training. Over time, that changes how you
approach your workouts: fewer excuses, more intention, and a weirdly satisfying pride when you glance at your barre and think,
“Yeah. I built that… and it’s building me back.”