Table of Contents >> Show >> Hide
- Quick safety snapshot (read this before you improvise)
- What “cold enough” means
- Step 1: Start clean and store smart
- Step 2: Chill milk fast (no fridge required)
- Step 3: Pack a cooler like it’s a tiny refrigerator
- Step 4: Protect the cooler from heat (where most plans fail)
- Step 5: Try the “ice-water thermos” trick for short trips
- Step 6: If ice is limited, use cold water and shade as your backup
- Step 7: Plan “cold handoffs” for longer days
- Step 8: Decide when to use it, freeze it, or toss it
- Two quick examples you can copy
- Real-World Experiences: What Parents Say Actually Works
Sometimes life laughs at your perfectly organized freezer stash. The power goes out. The hotel mini-fridge is “being delivered tomorrow.”
The road trip becomes a surprise detour tour. Suddenly, you’re protecting “liquid gold” with nothing but a cooler bag and determination.
The good news: you can keep breast milk cold without a refrigerator for a reasonable amount of timeif you focus on two things:
clean handling and temperature control. This guide breaks it into eight practical steps (plus real-world experiences)
to help you store pumped milk safely and confidently.
Quick safety snapshot (read this before you improvise)
- Clean matters: Wash hands before pumping/handling milk. If soap and water aren’t available, use alcohol-based hand sanitizer.
- Room temperature rule: Freshly expressed milk is best used or chilled within 4 hours at room temp (77°F / 25°C or cooler).
- Cooler rule: In an insulated cooler with frozen ice packs, breast milk can stay safely cold for up to 24 hours if packed well.
- After warming: Once milk reaches room temperature or is warmed, use within 2 hours.
- After a feeding: If baby doesn’t finish a bottle, use the leftover milk within 2 hours, then discard.
- Thawed milk: If previously frozen milk is thawed in the fridge, use within 24 hours (from fully thawed) and don’t refreeze.
You may see some sources mention longer room-temperature windows (like 6–8 hours) under very clean conditions and cooler rooms.
But when you’re in the real worldwarm car, busy day, unpredictable timingthe safest mindset is: chill early, chill often.
What “cold enough” means
“Cold” means refrigerator rangearound 39–40°F (about 4°C). You may not be able to measure temperature perfectly on the go,
but your goal is simple: keep milk surrounded by cold sources (ice packs/ice water) and protected from heat (sun, hot air, hot cars).
Step 1: Start clean and store smart
Safety starts before the first ounce is stored. Wash hands well. Use breast milk storage bags made for freezing milk,
or clean, food-grade bottles (glass or hard BPA-free plastic) with tight lids. Avoid random plastic bags and disposable bottle liners.
Leaks are annoying; contamination is worse.
Do these small things to save yourself later
- Label immediately: date/time, and add baby’s name if milk is going to childcare.
- Store small portions: about 2–4 ounces (or your baby’s usual feeding amount) so you don’t waste milk.
- Seal carefully: squeeze extra air out of storage bags and close tightly. Double-bag if you’re traveling.
Step 2: Chill milk fast (no fridge required)
If you can’t refrigerate right away, your next-best move is rapid cooling. Warm milk sitting in a warm room is the exact situation
you want to avoid. Use an ice bath to bring the temperature down quickly before the milk goes into a cooler.
The ice-bath method
- Keep the milk container sealed.
- Fill a bowl/pitcher with ice and cold water.
- Place the sealed container into the ice water (don’t let water touch the opening or seep in).
- Let it sit 10–20 minutes, swirling gently (no shaking needed).
If you plan to combine freshly expressed milk with milk that’s already chilled, cool the new milk first.
Adding warm milk to cold milk can partially warm (or thaw) what you already stored.
Step 3: Pack a cooler like it’s a tiny refrigerator
“An ice pack in a tote” is better than nothing, but the best results come from creating a cold environment that stays cold.
Think of your cooler as a “cold bubble.” Your job is to keep that bubble intact.
How to pack it so it actually works
- Pre-chill the cooler: If possible, place a frozen pack inside 10–15 minutes before loading milk.
- Ice packs on all sides: bottom, sides, and top if you can. Heat sneaks in from everywhere.
- Milk in the center: Put containers in the middle so they’re surrounded by cold.
- Fill empty space: Use a clean towel to reduce warm-air pockets inside the cooler.
- Keep milk dry: Put milk bags/bottles in a zip-top bag so meltwater doesn’t mess with labels or closures.
With a properly packed insulated cooler and frozen ice packs, guidance supports storing breast milk for up to 24 hours.
That’s enough for most workdays, travel days, and “my fridge betrayed me” moments.
Step 4: Protect the cooler from heat (where most plans fail)
Coolers don’t perform miracles if they’re sitting in a hot environment. The biggest enemies are direct sun, hot cars,
and constant opening. Treat the cooler like it’s trying to nap: keep it calm and stop checking on it every five minutes.
Heat-proofing rules
- Don’t store milk in a parked car trunk on a warm day. Trunks heat up fast.
- Keep the cooler in the air-conditioned cabin during driving when possible.
- Shade matters: keep the cooler under a seat, under a desk, or in a shaded corner (not on a sunny windowsill).
- Open less: every open-and-close dumps cold air and invites warm air inside.
- Ice packs should touch containers rather than sliding around like they’re on vacation.
Step 5: Try the “ice-water thermos” trick for short trips
For errands, appointments, or a couple of hours out, a wide-mouth insulated thermos can act like a mini cooler.
Water transfers cold more efficiently than air, so an ice-water bath inside a thermos can keep milk cold surprisingly well.
How to do it safely
- Use a sealed bottle or tightly closed milk bag.
- Put the milk bag/bottle inside a second zip-top bag (extra protection against leaks and water contact).
- Fill the thermos with ice and cold water, lower the sealed milk inside, and close the lid.
This isn’t a replacement for a real cooler on longer days, but it’s an excellent lightweight option for short outings.
Step 6: If ice is limited, use cold water and shade as your backup
No ice packs available? You still have options, but your timeline gets shorter and your “margin for error” shrinks.
Surrounding a sealed milk container with cool water can slow warming. Keeping it shaded helps even more.
Backup cooling options
- Cold-water bath: keep sealed milk in a container of cool water and refresh the water when it warms.
- Evaporative cooling: wrap the sealed container in a clean, damp cloth and place it in a breezy shaded area (works best in dry climates).
- Borrow cold: a clean frozen water bottle or frozen food item can serve as an emergency ice pack.
Important: in hot, humid conditions, these methods may only buy time. If you can’t keep milk cold, follow the conservative room-temperature rule and use milk sooner.
Step 7: Plan “cold handoffs” for longer days
If you’ll be away for many hours, don’t rely on one heroic ice pack. Plan how you’ll refresh cold sources.
This single step is the difference between “smooth day” and “why is everything sticky and stressful.”
Places to get cold without a fridge
- Cafés/gas stations: ask for a cup of ice to refresh your cooler.
- Hotels: use the ice machine, and ask if staff can refreeze your ice packs overnight.
- Work/school: use a shared food refrigerator if available, or keep milk in your own cooler bag.
- Friends/family/childcare: arrange a quick drop-off so milk reaches reliable cold storage sooner.
Flying with breast milk (quick note)
Air travel is doable. Pack milk in a cooler bag with frozen gel packs, declare it at security, and expect extra screening.
Policies can change, so check current airport/security guidance before you fly, especially if you’re carrying larger amounts.
Step 8: Decide when to use it, freeze it, or toss it
Milk safety is mostly about time + temperature. Here’s a practical decision guide you can use when you’re tired and your brain is doing its best impression of a loading screen.
If the milk stayed cold in a properly packed cooler
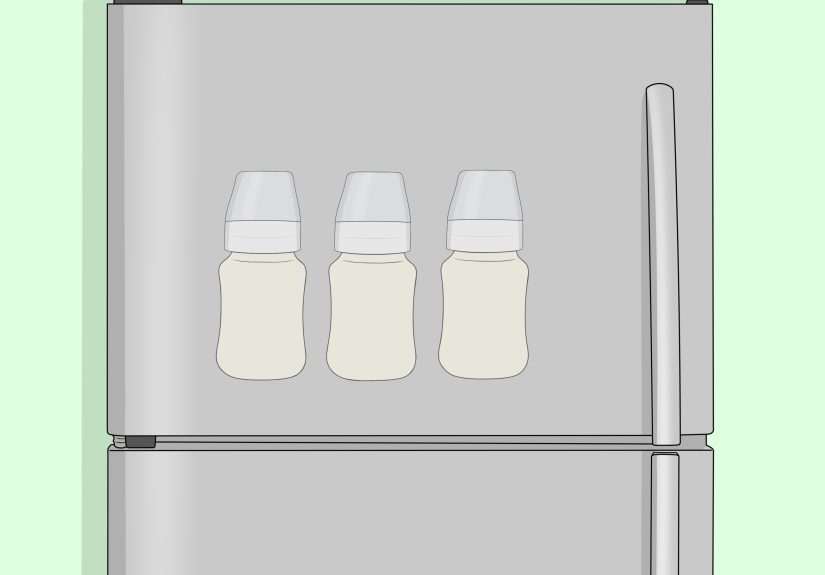
- Use it the same day, or refrigerate/freeze as soon as you reach reliable cold storage.
- Try to keep total cooler time within 24 hours.
If the milk warmed to room temperature
- Use within 2 hours once it’s warmed (and within general room-temperature limits for freshly expressed milk).
- If you’re unsure how warm it got, choose the safer option and discard.
If baby started a bottle but didn’t finish
- Use the remaining milk within 2 hours, then discard the rest.
- Prevent waste by offering smaller portions and topping up if needed.
Extra caution situations
If your baby was born prematurely, is medically fragile, or has immune concerns, follow stricter guidance from your pediatrician or care team.
In those situations, “better safe than sorry” isn’t a sloganit’s the plan.
Two quick examples you can copy
Example 1: An 8-hour day out with pumping
- Pump into a clean container; label immediately.
- Chill the container in an ice bath for 10–20 minutes.
- Pack it in the center of a cooler surrounded by frozen packs.
- Keep the cooler shaded and closed; open only when necessary.
- Midday: refresh ice packs with a cup/bag of ice if needed.
- At home: refrigerate or freeze milk right away.
Example 2: Power outage at home
- Move milk into the smallest cooler you have (smaller coolers stay colder).
- Add frozen gel packs; add clean frozen items from the freezer as backup cold sources.
- Keep the cooler closed in the coolest room of the house.
- Once power returns, refrigerate or freeze promptlydon’t stretch the timeline.
Real-World Experiences: What Parents Say Actually Works
On a six-hour road trip, one parent planned to “wing it” with a single small ice pack. Two hours in, the cooler felt warm and panic set in.
The fix ended up being simple: at the next gas station they bought a bag of ice, moved the milk bags into a zip-top bag (to keep meltwater out),
then packed ice on all sides like a tiny snow fort. They also stopped opening the cooler every time they wanted a snack. Result: the milk stayed cold
the rest of the driveand the snacks survived too.
Another common situation is the long commute plus a full school or work day. Parents who do best here treat cold storage like a relay race.
They freeze two sets of ice packs, carry a compact insulated cooler, and swap in a fresh pack halfway through the day (often right after a pumping session).
One mom said the “swap moment” became as automatic as charging a phone. Her other trick: label each container before pumping starts, so she’s not trying to write
dates with one hand while balancing a pump flange with the other.
Outdoor days bring their own comedy. At a summer festival, a parent tucked the cooler in the car trunk “for safety” and accidentally turned it into a slow cooker.
After that, they kept the cooler inside the air-conditioned cabin, shaded it with a jacket, and parked the car so the sun wasn’t beating directly on the bag.
On beach days, people often bury coolers in the sand for stabilityjust don’t bury the milk. Sand is a great insulator… for heat. Keeping the cooler in the shade
(under a chair or umbrella) made a bigger difference than any “extra zippered pocket” ever could.
Power outages are where preparation pays off. Families who already keep a few “milk-only” ice packs in the freezer are the least stressed.
When the power drops, they move milk into a small cooler, then add frozen items from the freezer (a bag of frozen peas works surprisingly well) to extend the cold time.
The big lesson: don’t keep opening the freezer “to check.” Every peek is basically letting the cold out, like opening the oven because you miss your cookies.
Air travel stories are full of small wins. Many parents pack a cooler bag with frozen gel packs and declare the milk at security right away, which helps the screening go smoother.
One traveler kept an empty insulated tumbler in their carry-on; after security, they filled it with ice from a café and used it as a mini ice bath for a couple of bottles during
a long layover. Another asked the airline lounge for extra icepolitelyand got it.
The most repeated takeaway is that the “best” system is the one you can repeat when you’re tired. Parents say it’s better to have a basic cooler routine you actually follow
than a complicated plan that falls apart on day two. If you can keep the milk cold and keep your timeline simple, you’re doing exactly what that liquid-gold mission requires.