Table of Contents >> Show >> Hide
- What Is Screen Printing (and Why It’s So Addictive)
- What You’ll Need (No, Not Everything on the Internet)
- How to Make a Screen Print: 12 Steps
- Step 1: Choose Your Surface and Ink (Because They’re a Package Deal)
- Step 2: Pick the Right Mesh Count (The “Resolution” of Screen Printing)
- Step 3: Create Your Artwork (Think in Shapes, Not Just Pictures)
- Step 4: Print a Film Positive (Your Design’s “Shadow”)
- Step 5: Degrease the Screen (Yes, Even If It’s New)
- Step 6: Coat the Screen with Photo Emulsion (Thin and Even Wins)
- Step 7: Expose the Screen (The Step Where Timing Matters)
- Step 8: Wash Out the Design (Reveal the Stencil)
- Step 9: Block Out Pinholes and Tape the Edges
- Step 10: Set Up Registration and Do a Test Print
- Step 11: Print for Real (Flood, Pull, LiftRepeat)
- Step 12: Cure the Ink, Then Clean Up and Store (Future-You Will Be Grateful)
- Troubleshooting: Fix the Usual Suspects
- Beginner-Friendly Example Project: One-Color Tee Logo
- of Real-World Experience: What No One Tells You (Until You’ve Ruined a Shirt)
- Conclusion: Your First Screen Print Is the Start, Not the Finish Line
Screen printing looks like magic the first time you see it: you drag a squeegee across a mesh screen andbamyour design appears on a shirt, poster, tote, or whatever brave surface volunteered as tribute.
The truth is even better: it’s a repeatable process you can learn in an afternoon, then refine for years (because yes, you will eventually have strong opinions about mesh count like it’s a sports rivalry).
This guide breaks down how to make a screen print in 12 practical steps, using the most common beginner-friendly method: a photo emulsion stencil.
Along the way, you’ll get real-world tips for cleaner edges, fewer “why is it doing THAT?” moments, and prints that look intentionalinstead of “experimental.”
What Is Screen Printing (and Why It’s So Addictive)
Screen printing (aka “silk screening,” even though most screens are polyester now) uses a woven mesh stretched over a frame. You block parts of that mesh with a stencil, then push ink through the open areas to transfer your design onto a surface.
Once your screen is made, you can print the same design over and over with consistent resultsperfect for batches of shirts, posters, or limited editions.
Photo Emulsion in One Sentence
Photo emulsion is a light-sensitive coating that hardens when exposed to UV light; the parts protected by your design stay soft and wash out, leaving open mesh where ink can pass through.
What You’ll Need (No, Not Everything on the Internet)
You can keep your setup simple. Here’s the core kit for home screen printing with photo emulsion:
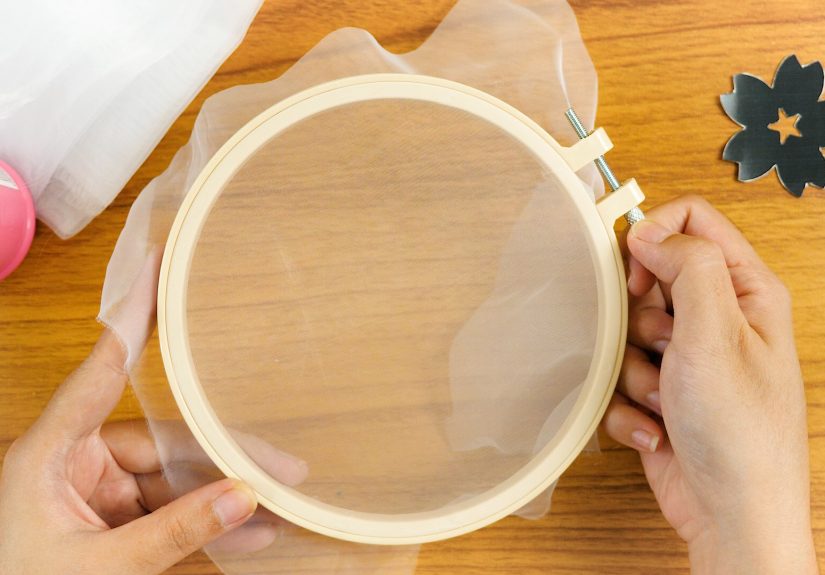
Screen + Setup
- Screen frame with mesh (wood or aluminum). Mesh count depends on detail and ink thickness.
- Squeegee (a medium firmness is a solid all-around choice).
- Hinges/clamps or a simple registration setup to keep the screen steady.
- Flat printing surface (a table you can clean easily).
Stencil + Exposure
- Photo emulsion + sensitizer (diazo or pre-sensitized emulsion).
- Scoop coater (best) or a clean squeegee for coating.
- Transparency/film for your design (a “film positive”).
- Exposure light (a real exposure unit is easiest; a strong UV source can work with testing).
Ink + Curing
- Ink (water-based inks are often friendlier for beginners; plastisol is popular but needs heat curing).
- Scrap paper/cardstock for test pulls.
- Heat source (heat press, conveyor dryer, or iron for some inksfollow ink directions).
Cleanup + Safety
- Degreaser (helps emulsion stick evenly).
- Washout space (sink, tub, or outdoor hose area).
- Gloves + eye protection, and good ventilationespecially if you use any solvents or haze removers.
- Painter’s tape for blocking edges and tiny pinholes.
Friendly safety reminder: Some screen printing chemicals (sensitizers, emulsion remover, solvents) aren’t “kids-craft” materials. Use gloves, avoid skin/eye contact, work in ventilation, and follow the label directions. If you’re printing at home, water-based ink workflows can reduce the need for harsh cleaners.
How to Make a Screen Print: 12 Steps
-
Step 1: Choose Your Surface and Ink (Because They’re a Package Deal)
Start by deciding what you’re printing on: cotton tees, hoodies, paper posters, canvas totes, wood panels, etc.
Then pick an ink made for that surface. A basic rule: fabric ink for fabric, paper ink for paper, and so on.Example: Printing on a 100% cotton shirt? A beginner-friendly water-based textile ink can feel softer than thick ink depositsespecially on lighter garments.
-
Step 2: Pick the Right Mesh Count (The “Resolution” of Screen Printing)
Mesh count is how many threads are in the mesh per inch. Lower mesh lets more ink through (great for bold designs and thicker ink). Higher mesh holds finer detail and prints thinner layers.
- Lower mesh (around 110): Bold graphics, thicker ink, athletic prints.
- Mid mesh (around 156): Great “general purpose” for many t-shirt designs.
- Higher mesh (200+): Fine lines, detailed art, thinner inks, paper prints.
If you’re unsure, choose a mid-range mesh and focus on technique. Your first screen doesn’t need to be perfect; it needs to exist.
-
Step 3: Create Your Artwork (Think in Shapes, Not Just Pictures)
Screen printing is basically controlled ink. Designs with clear shapes and strong contrast print the easiest.
If you’re doing a one-color print, convert your design to solid black shapes. For multi-color prints, separate each color into its own layer (each color usually needs its own screen).Pro tip: Avoid hairline-thin outlines on your first run. Tiny details can print, but they’ll demand better exposure, tighter registration, and a calmer personality.
-
Step 4: Print a Film Positive (Your Design’s “Shadow”)
Print your design onto transparency film so the black areas are as opaque as possible. The goal is to block UV light wherever you want ink to pass later.
For designs with light text on a dark background, make sure you print the correct “positive” orientation (and mirror it if needed, depending on your setup and where the film sits).Quick check: Hold it up to a bright light. If the black areas look grayish, double-print or adjust printer settings for higher density.
-
Step 5: Degrease the Screen (Yes, Even If It’s New)
Degreasing removes oils and residue so emulsion coats evenly and adheres well. Wet the screen, apply degreaser, scrub gently on both sides, then rinse thoroughly.
Let it dry completely.Common mistake: Touching the mesh with bare fingers after degreasing. Your hands naturally leave oilsuse clean gloves or hold the frame edges.
-
Step 6: Coat the Screen with Photo Emulsion (Thin and Even Wins)
Mix emulsion and sensitizer if required (follow the product’s directions), then coat the screen with a scoop coater for a smooth, consistent layer.
Coat one side, then the other, aiming for an even sheen without drips or thick ridges.Dry the coated screen in a dark, dust-free place with airflow (a “darkroom” setup can be as simple as a closet with a safe low light).
Pro tip: Thicker emulsion layers can reduce detail and complicate washout. If your emulsion looks like frosting, you went too far into “cake decorating.”
-
Step 7: Expose the Screen (The Step Where Timing Matters)
Place your dry film positive on the screen in the correct position, then press it tightly against the emulsion side (glass helps create sharp edges by keeping everything flat).
Expose under your light source for the recommended time.Exposure time depends on your light, distance, mesh, emulsion type, and even humidity. If your setup is new, run an exposure test (a step-wedge or calculator method) so you’re not guessing.
Rule of thumb: Underexposed screens wash out too easily and break down while printing; overexposed screens are stubborn to wash out and can lose fine detail.
-
Step 8: Wash Out the Design (Reveal the Stencil)
After exposure, gently wet both sides of the screen, then let the water soak in briefly.
Use a soft spray at first to “wake up” the image area, then increase pressure as needed until the unexposed emulsion washes away and your design opens in the mesh.Hold the screen up to light to inspect open areas. Once it looks clean, let it dry fully.
Pro tip: If your whole stencil starts dissolving like it’s melting, you’re likely underexposedor you got impatient and power-washed it like a sidewalk.
-
Step 9: Block Out Pinholes and Tape the Edges
Tiny “pinholes” happen (dust, uneven coating, life choices). Use screen blockout or painter’s tape to cover unwanted open mesh areas.
Tape the inside edges of the screen too, so ink doesn’t creep into the frame corners.This small step makes a big difference in keeping your prints clean and consistent.
-
Step 10: Set Up Registration and Do a Test Print
Place your shirt or paper on the platen/table, then align the screen so the design lands exactly where you want it.
Mark placement guides with tape so you can repeat it.Do at least one test pull on scrap material. This is where you adjust:
- Ink amount (too much floods; too little prints patchy)
- Squeegee angle (usually around 10–20 degrees is common)
- Pressure (firm, controlled, not “I’m kneading dough”)
- Off-contact (a tiny gap can help reduce smearing)
-
Step 11: Print for Real (Flood, Pull, LiftRepeat)
A basic rhythm:
- Flood stroke: Lightly drag ink across the screen to fill the image area.
- Print stroke: Apply firm pressure and pull (or push) the squeegee evenly across the design.
- Lift the screen: Check the print. Smile. Or squint thoughtfully. Both are valid.
If you’re printing multiple items, keep your motion consistent. Consistency is how you get a stack of prints that look like they’re related.
Multi-color note: For two or more colors, print one color, let it set or flash-cure if needed, then align the next screen using registration marks. Start simple: one color first, then graduate to two colors once your confidence level stops shaking.
-
Step 12: Cure the Ink, Then Clean Up and Store (Future-You Will Be Grateful)
Curing is what makes prints durable. Follow your ink’s specific instructions.
Many fabric inks need heat setting at a certain temperature/time. Some water-based inks air-dry but still benefit from heat for wash-fastness.After printing, clean ink off the screen promptly. Dried ink can clog mesh and make reclaiming harder.
If you plan to reuse the same design soon, clean gently and store the screen dry and dark.
If you want to reuse the screen for a new design, reclaim it using emulsion remover and degrease again.Reality check: Cleanup is part of screen printing. The sooner you accept this, the sooner you become powerful.
Troubleshooting: Fix the Usual Suspects
Problem: The design won’t wash out
- Likely cause: Overexposure, film not opaque enough, or too much emulsion.
- Try: Reduce exposure time, improve film density, coat thinner, or test with an exposure calculator.
Problem: The stencil washes away too easily
- Likely cause: Underexposure or emulsion not fully dry before exposure.
- Try: Increase exposure time, dry longer, and ensure proper degreasing.
Problem: Print looks blurry or smears
- Likely cause: Too much ink, too much pressure, poor off-contact, or screen shifting.
- Try: Use less ink, reduce pressure, add a slight off-contact, and secure the screen.
Problem: Print is patchy
- Likely cause: Not enough ink flood, uneven squeegee pressure, or mesh too high for thick ink.
- Try: Flood properly, slow down your stroke, and consider a lower mesh for thicker inks.
Beginner-Friendly Example Project: One-Color Tee Logo
If you want a straightforward first win, try a one-color chest logo on a light cotton t-shirt:
- Artwork: A bold black logo with thick lines.
- Screen: Mid mesh (around 156) for balance.
- Ink: Water-based textile ink (easier cleanup).
- Workflow: Test print → adjust pressure/angle → print run → heat set.
You’ll learn the whole process without juggling multiple screens and registration stress.
of Real-World Experience: What No One Tells You (Until You’ve Ruined a Shirt)
The first time I tried screen printing, I thought the hardest part would be pulling the squeegee in a perfectly straight linelike I was auditioning for a “World’s Smoothest Arm” competition.
Nope. The real boss level is everything around the squeegee: preparation, timing, and the weird little variables that turn your “simple DIY” into a science experiment.
My biggest early lesson was that exposure time is not a vibe. It’s not “about how you feel in your heart.” It’s about your light source, distance, emulsion thickness, mesh, and the humidity in your space.
One day you expose for eight minutes and it’s flawless. Next day, same time, and the stencil either refuses to wash out or melts like ice cream on a dashboard.
The fix wasn’t mysticalit was running an exposure test and writing down the results like a reasonable person who wants repeatable outcomes.
Second lesson: degreasing is non-negotiable. I skipped it once because the screen “looked clean,” and the emulsion coated with the mood of a cat avoiding affectionuneven, streaky, and absolutely not interested in sticking.
After that, I treated degreasing like brushing my teeth: not thrilling, but skipping it is how you end up with consequences.
Third lesson: ink control is everything. Beginners tend to use too much ink, then wonder why details fill in, edges get fuzzy, and the print feels like it’s wearing a winter coat.
Less ink plus a proper flood stroke made my prints cleaner immediately. Also, slowing down helped: a controlled, steady pull beats a frantic “get it over with” swipe every time.
Another surprise was how much registration matters even on a one-color print. A screen that shifts a few millimeters can turn a crisp logo into something that looks slightly… haunted.
Tape guides on the table. Mark placement. Do a test print. It’s boring in the moment and glorious later when your stack of prints matches.
And finally: cleanup. Everyone wants to be the person who prints all day and magically has a spotless studio at night. In reality, printing is half art, half responsible dishwashing.
The good news is that once you build a simple routinescrape ink back into the container, rinse before it dries, keep a dedicated sponge/brushcleanup stops being a punishment and starts feeling like closing the loop on a project you can do again tomorrow.
Screen printing gets wildly fun once you stop trying to “wing it” and start treating it like a repeatable craft. Your first print won’t be perfect.
But it will be yoursand that’s the moment you realize you can put your design on real things in the real world. That’s the hook.
Conclusion: Your First Screen Print Is the Start, Not the Finish Line
If you remember only three things: degrease your screen, test your exposure, and print with consistent pressure.
Do that, and your results will jump from “experimental” to “dang, that looks legit” surprisingly fast.
Start with one color, keep your design bold, and treat each run as practice. Soon you’ll be stacking clean prints, dialing in mesh counts, and casually saying things like “my stencil held up great” as if that’s a normal sentence people use.