Table of Contents >> Show >> Hide
- What You’re Really Farming (Quick Waxworm 101)
- Before You Start: The “Don’t Accidentally Become a Bee Villain” Rules
- What You Need (Simple, Beginner-Friendly Gear)
- Step-by-Step: Starting Your Wax Worm Farm
- How the Farm Becomes Self-Sustaining (Eggs → Worms → Pupae → Moths)
- Maintenance: Keep It Clean Enough to Not Smell Like Regret
- Harvesting Waxworms (Without Collapsing Your Whole Colony)
- How to Store Waxworms So They Don’t Turn Into Moths Overnight
- Troubleshooting: The 7 Most Common Waxworm Farm Problems
- Scaling Up (Without Turning Your Home Into an Insect Factory)
- Real-World Experiences and Lessons People Learn the Hard Way (So You Don’t Have To)
- Conclusion
Wax worms (aka waxworms) are the squishy little overachievers of the feeder-insect world: easy to keep, useful for fishing bait and reptile treats, and oddly satisfying to raise once you get the hang of it. They’re also the larval stage of the greater wax moth (Galleria mellonella)which is a polite way of saying: “this insect would love to redecorate a beehive.”[1][2]
So yes, you can farm wax worms at home. And yes, you should do it responsiblyespecially if you live near beekeepers or have any chance of wax moths escaping into the wild.[3][4] Follow the steps below and you’ll have a clean, steady waxworm supply without turning your house into a moth nightclub.
What You’re Really Farming (Quick Waxworm 101)
Waxworms are the caterpillar stage of the greater wax moth. The adults are small moths; the larvae are the “worms” people buy as bait or feeders.[1][5]
Temperature, food, and humidity drive everything: warm conditions speed up growth and reproduction; cooler conditions slow them down for storage.[2][6]
Why temperature matters
- Breeding & fast growth: wax moths develop well in warm conditions (commonly around the upper 70s to low 90s °F, depending on the setup).[2][6]
- Storage & “pause mode”: keeping waxworms cool (often mid-50s °F) slows development so they last longer before pupating.[7][8]
Before You Start: The “Don’t Accidentally Become a Bee Villain” Rules
- Keep cultures indoors and sealed. Wax moths prefer dark, warm, still spacesbasically the opposite of “secure.”[3]
- Do not release moths outdoors. They’re pests of stored comb and weak hives.[1][4]
- Don’t set up near beekeeping equipment (frames, supers, stored comb). Wax moths are attracted to those environments.[3][4]
- Plan disposal: if you’re shutting a culture down, freeze contents before trashing to prevent accidental survival and escape.[5][9]
What You Need (Simple, Beginner-Friendly Gear)
Containers (two is better than one)
- One “breeder bin” (for moths/egg-laying and pupae)
- One “grow-out bin” (for larvae to eat and bulk up)
Clear plastic totes work well. The #1 requirement is ventilation with escape control: you want airflow to reduce moisture and mold, but openings must be covered with fine mesh so newborn larvae can’t slip out.[10]
Ventilation materials
- Fine metal or nylon mesh (smaller holes are safer)
- Hot glue, silicone, or strong tape to secure mesh
- A utility knife (adult help recommended if you’re a teen)
Substrate/food ingredients
Many waxworm diets are variations on bran/grain plus sweetener and a moisture-holding ingredient (often honey and glycerin).[11] For home farming, you’re aiming for a mix that stays slightly moist but never wet.
- Wheat bran or oat bran
- Honey
- Food-grade glycerin (often sold near baking/candy supplies)
- Optional boosters: wheat germ or a little dry yeast (used in many rearing diets)[11]
Egg-laying & pupation surfaces
- Corrugated cardboard strips (great for eggs and cocoons)
- Egg cartons or crumpled paper (texture encourages cocooning)
Basic monitoring tools
- Cheap thermometer (and a hygrometer if you want to be fancy)
- Marker + masking tape (label datesyour future self will thank you)
Step-by-Step: Starting Your Wax Worm Farm
Step 1: Get a starter culture (the easiest way)
The simplest starter is a cup of live waxworms from a reputable feeder or bait supplier plus a handful that are already close to pupating (or a few pupae if available). You want some to mature into moths so you can get eggs for the next generation.[6][12]
Step 2: Prep your containers (ventilation + escape-proofing)
Cut one or two large ventilation windows in the lid of each tote and cover them with fine mesh. Secure the mesh firmlymoths are not strong, but they’re persistent, and tiny larvae are basically living dust with ambition.[10]
- Goal: good airflow without drafts blasting directly onto the substrate.
- Avoid: big gaps around lid edges; newborn larvae can sneak through surprisingly small spaces.
Step 3: Make the “home diet” substrate (easy recipe)
This is a practical, beginner-friendly mix inspired by common rearing approaches (bran + honey + glycerin). Your substrate should feel like damp sand that can crumble, not like cookie dough.[11][6]
Simple waxworm substrate (small batch)
- 4 cups wheat bran (or oat bran)
- 1/3 cup honey
- 1/3 cup glycerin
- Optional: 2–3 tablespoons wheat germ or a teaspoon of dry yeast
- Warm water: add slowly only if needed (usually 1–3 tablespoons)
Mix until evenly coated and crumbly. If you squeeze a handful and it forms a sticky lump, it’s too wetadd more bran. If it’s dusty and bone-dry, add a tiny splash of warm water and mix again. Moisture control is mold control.[6][10]
Step 4: Build the habitat inside the bin
- Add 1–2 inches of substrate to the bottom of the grow-out bin.
- Place corrugated cardboard strips on top (some flat, some leaning).
- Add a few egg carton sections or crumpled paper as “cocoon real estate.”
Step 5: Add your worms and let nature do its weird little thing
Put your starter waxworms into the grow-out bin. Keep the lid on. Place the bin somewhere warm and stable.
In many lab and rearing references, wax moth development is strong in warm ranges (often around 77–91°F / 25–33°C).[2][6]
Beginner-friendly temperature targets
- For breeding and fast growth: aim roughly 80–90°F (warm closet, top shelf of a utility room, etc.).[2][6]
- For slowing them down (storage): around the mid-50s °F helps keep them dormant longer.[7][8]
Keep the bin out of direct sunlight. Darkness is finewax moths naturally prefer dark hiding places.[3]
How the Farm Becomes Self-Sustaining (Eggs → Worms → Pupae → Moths)
What you’ll see over time
- Larvae eating and growing: they tunnel through substrate and leave “frass” (insect poopglamorous).[6]
- Cocoons: mature larvae spin silky cocoons on cardboard/rough surfaces.[1]
- Pupae: inside cocoons, they transform.
- Adult moths: they emerge, mate, and lay eggsusually in protected cracks and textured surfaces like corrugated cardboard.[6]
Development speed varies with temperature and resources. Published work notes the full development can be as short as about a month under warm, controlled conditions, and much longer when it’s cooler or food is limited.[12]
The two-bin system (recommended)
Once you see lots of cocoons, move a portion of the cardboard pieces with cocoons into your breeder bin. This is where moths can emerge and lay eggs without getting trampled by an army of hungry larvae.
- Breeder bin: cocoons + cardboard “egg-laying zones.”
- Grow-out bin: larvae + food substrate.
When eggs hatch, the tiny larvae will migrate into the substrate and begin feeding. If you keep your breeder bin set up with fresh cardboard, you can harvest egg-laying surfaces and “seed” new grow-out bins as needed.[6]
Maintenance: Keep It Clean Enough to Not Smell Like Regret
Weekly quick-check routine (10 minutes)
- Look for condensation: moisture on the lid means ventilation is too low or substrate is too wet.[10]
- Check for mold: white fuzz = remove affected substrate and dry things out.
- Stir lightly: gently break up clumps so air can circulate.
- Refresh food: add a small amount of new substrate when the old mix looks mostly like frass.
Pro tip: freeze your dry ingredients first
If you’ve ever opened a bag of grain and found “surprise roommates,” you understand why. Freezing bran before use can reduce the chance of pantry moths/mites showing up uninvited. (Your waxworms can be the only drama in this story.)
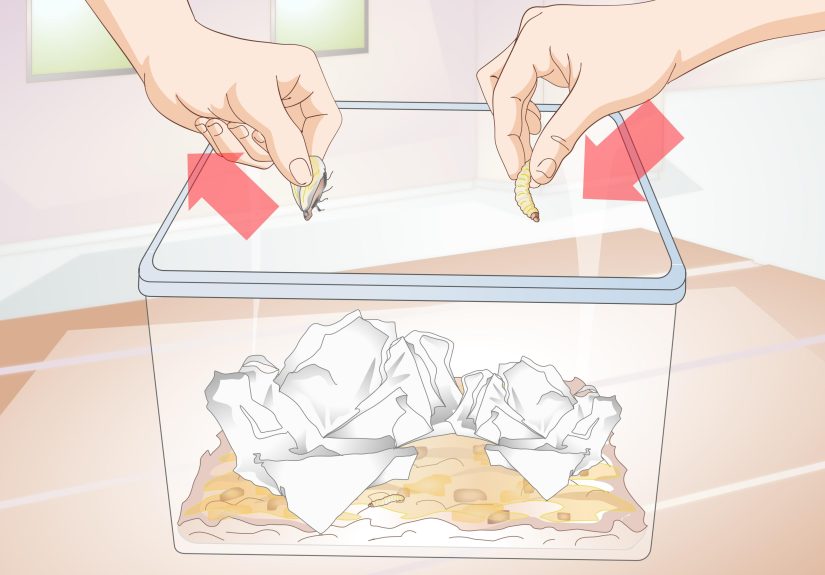
Harvesting Waxworms (Without Collapsing Your Whole Colony)
Pick the right size
For feeding or bait, most people want waxworms that are plump, creamy-white, and activenot ones that are already spinning cocoons or turning darker and sluggish.
Harvest strategy
- For continuous production: harvest only a portion (say 25–40%) and leave the rest to pupate and replenish the colony.
- For “batch production”: let most mature, harvest heavily, then restart from saved cocoons/moths.
How to Store Waxworms So They Don’t Turn Into Moths Overnight
Cool storage slows their development. Several feeder-care resources recommend keeping waxworms around the mid-50s °F to keep them dormant longer and reduce moisture issues.[7][8]
- Target range: roughly 50–60°F (often refrigerator door areas or a wine cooler are closer to this than the coldest fridge shelf).[7][8]
- Keep it dry: high humidity shortens lifespan and can cause spoilage or mold.[7]
- Don’t freeze unless you’re disposing: freezing kills life stages (useful for shutdown), but it’s not “storage” if you still want living worms.[5][9]
Troubleshooting: The 7 Most Common Waxworm Farm Problems
1) Mold outbreak
Usually caused by too much moisture and not enough airflow. Remove moldy sections, add dry bran, and increase ventilation.[10]
2) Bad smell
A healthy culture smells mildly sweet/grainy. Sour or rotten smell means the substrate is too wet or decomposing. Replace most of the substrate and dry things out.
3) Worms are tiny and slow
Either temperature is too cool for growth or nutrition is too low. Warm the grow-out bin (safely) and refresh substrate. Development is temperature-dependent.[12][6]
4) Everyone pupated at once (oops)
Your bin was too warm for too long or you didn’t harvest sooner. Cool storage slows this down.[7][8]
5) Escapes
Vent holes too large or lid gaps. Use finer mesh and make sure the lid seals well. Tiny larvae can slip through surprisingly small spaces.[10]
6) Moths, but no babies
Give moths textured egg-laying surfaces (corrugated cardboard) and keep the breeder bin warm and dim. Also make sure you have both sexesnature loves a “two-player mode.”[6]
7) You’re worried about bees (good!)
Keep cultures contained and away from any stored beekeeping equipment. Wax moths thrive in dark, warm, stagnant storage conditions and are recognized hive/comb pests.[3][4]
Scaling Up (Without Turning Your Home Into an Insect Factory)
If you want more production, scale slowly:
- Add a second grow-out bin before you expand the breeder bin.
- Label bins with start dates so you can stagger generations.
- Keep your “breeding warmth” stable and your “storage cool” consistent.
Many rearing protocols emphasize that diet consistency and rearing conditions strongly affect health and outcomes.[6] Translation: waxworms do better when you stop improvising every week like a cooking show contestant.
Real-World Experiences and Lessons People Learn the Hard Way (So You Don’t Have To)
Most beginners don’t fail because waxworms are “hard.” They fail because waxworms are easyand “easy” makes humans overconfident. The most common first-timer move is mixing the substrate like it’s brownie batter: thick, sticky, and wet. It feels productive. It also creates a tiny sauna, and saunas are wonderful for humans and absolutely fantastic for mold. Once people switch to a crumbly, barely-moist mix and add more ventilation, the colony usually stabilizes fast.
Another classic moment: the “Where did my worms go?” phase. You check the bin, and the worms are gonebecause they’re under the substrate doing what larvae do. Then, two weeks later, you notice silky tunnels and little cocoons attached to cardboard like someone hot-glued lint everywhere. That’s when the panic sets in: “Are they dying?” No. They’re graduating. In warm conditions, development can move quickly, and you’ll see pupation sooner than you expected.[12] The fix is planning: harvest your best worms earlier, and move the “cocoon cardboard” into a breeder bin so you don’t lose your future egg-layers.
People also learn that waxworms have two personalities depending on temperature. Warm bin? They’re active, hungry, and determined to become moths ASAP. Cool storage? They mellow out and basically go into “screensaver mode,” which is why feeder-care guides recommend mid-50s °F for keeping them longer.[7][8] The practical lesson is to separate your goals: use warmth for production, cool temps for holding inventory. Trying to do both in one bin is like trying to host a dance party in a libraryit technically can happen, but everyone’s stressed and something smells weird.
Then there’s the “moth management” reality check. Adult wax moths aren’t glamorous. They’re not butterflies. They’re more like tiny, nervous paper airplanes with wings. But when they have a safe, textured place to lay eggs (corrugated cardboard is a favorite), they do their job reliably.[6] People who succeed long-term usually build a repeatable rhythm: every week, they move a few cocoon-covered cardboard pieces into the breeder bin, and every week or two, they transfer egg-laying cardboard back to a grow-out bin to seed the next generation.
Finally, the most responsible keepers develop a strong “containment mindset.” They’ve read enough beekeeping resources to know wax moths are serious pests of stored comb and weak colonies.[3][4] So they keep bins sealed, work over a table (not a carpet), and freeze any discarded substrate before trashing itbecause “accidental release” is not a personality trait anyone wants. And once you’ve had your first successful cycleworms to moths to eggs to wormsyou’ll probably feel a strange pride… followed immediately by the thought: “Wow, I’m basically running a tiny insect startup.” Congratulations. Your investors are reptiles and fish.
Conclusion
Starting a wax worm farm is mostly about mastering three things: ventilation, moisture control, and temperature management. Keep your grow-out bin warm for production, keep harvested worms cool for storage, provide cardboard for cocoons and egg-laying, and you can maintain a steady supply with minimal weekly effort.[6][7][8]
Do it responsibly (containment matters), keep things clean, and you’ll have a reliable waxworm pipelinewithout hosting an uninvited moth convention.