Table of Contents >> Show >> Hide
- What “Electrical Installation” Really Means in an Older House
- Safety First: Rules You Never Bend
- The Anatomy of a Home Electrical System
- Planning an Electrical Installation in an Old House
- Common Electrical Installation Mistakes (and How to Avoid Them)
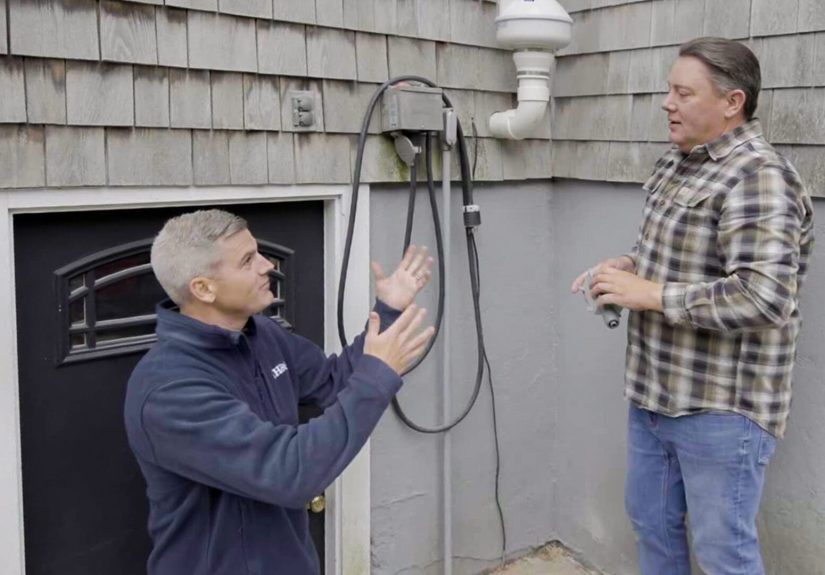
- When to DIY and When to Call the Pros
- Living Comfortably With Your New Electrical System
- Real-World Experiences: Lessons From Old-House Electrical Upgrades
- Conclusion
Old houses have charm: wavy glass, creaky floors, maybe a mysterious door that goes nowhere.
What you don’t want from an old house is mysterious wiring. A modern electrical installation
should quietly power your lights, appliances, and gadgets without tripping breakers, humming,
or making you wonder if you should sleep with a fire extinguisher next to the bed.
In this guide, we’ll walk through how electrical installation works in an older home, what’s
different about modern systems, why permits and inspections actually protect you, and when it’s
time to call in a licensed electrician instead of “that guy on YouTube.” The focus is on
safety, practicality, and long-term reliability, using principles from modern residential
wiring practices and the National Electrical Code (NEC).
What “Electrical Installation” Really Means in an Older House
When people say “electrical installation,” they usually picture someone pulling yellow NM cable
through studs and snapping in a few outlets. In reality, an electrical installation is the entire
system: service drop, meter, main panel, branch circuits, outlets, switches, lights, and all the
safety devices that keep you from getting shocked or burning the place down.
In many older homes, wiring has evolved in layers. You might have:
- Original knob-and-tube or cloth-covered wiring hidden behind plaster
- Mid-century fuse boxes or early breaker panels that are now undersized
- Random “DIY upgrades” where someone added outlets or lights without permits
A modern electrical installation replaces that patchwork with a planned system: correctly sized
service, grounded panels, clearly labeled breakers, and circuits designed for today’s loads
(think induction ranges, EV chargers, and home offices, not just a toaster and a TV).
Safety First: Rules You Never Bend
Before anyone touches a wire, safety comes first. Modern codes are written in response to real
fires and real injuries, not because inspectors like paperwork.
Basic homeowner safety habits
- Always shut off the correct breaker (and verify power is off with a tester).
- Use proper tools: non-contact voltage testers, insulated screwdrivers, and approved boxes.
- Never work on energized circuitsthis is not a “quick spark” situation.
- Wear eye protection and avoid metal ladders around electrical work.
Electrical inspections and safety checklists are based on NEC minimum requirements and decades
of incident data. Inspectors look for problems like overloaded panels, missing ground-fault
protection, damaged wiring, and loose connectionsall things that quietly raise your fire and
shock risk over time.
Permits and inspections: not just red tape
For most new circuits, panel upgrades, and major rewiring, you’re legally required to pull an
electrical permit and pass inspections. Permits trigger oversight from an authority having
jurisdiction (AHJ), which could be a city, county, or state agency.
Typically, you’ll have:
-
Rough-in inspection: Before covering walls, the inspector checks cable routing,
box fill, support, and grounding. -
Final inspection: After devices, fixtures, and appliances are installed and
tested, the inspector verifies code compliance and proper operation.
Skipping permits can cause insurance headaches if there’s ever a fire, and some policies may deny
claims if unpermitted electrical work is to blame. It’s not just about following rules; it’s about
protecting your investment.
The Anatomy of a Home Electrical System
From meter to main panel
Power from the utility enters your home at the service entrance, passes through the meter, and
lands in the main service panel. This panel contains:
- A main breaker or disconnect that can shut off power to the entire house
- Neutral and ground bars that bond to the grounding electrode system
- Individual circuit breakers feeding branch circuits throughout the home
Modern panels are built around breakers, not fuses, and are sized to match the home’s expected
load: 100-amp service is the minimum in many areas, while 150- or 200-amp service is common for
homes with electric ranges, dryers, or heat pumps. Correct grounding and bonding inside the panel
are critical to clearing faults safely.
Circuits, breakers, and wire sizes
Branch circuits carry power from the panel to outlets, switches, lights, and fixed appliances.
Most general-purpose circuits are:
- 15 amps on 14-gauge copper wire
- 20 amps on 12-gauge copper wire
Larger loads (like ranges, dryers, EV chargers, or mini-splits) use 240-volt circuits with
appropriately sized wire and two-pole breakers. Matching the wire gauge to the breaker size is
non-negotiableoversizing the breaker can let the wire overheat before the breaker trips.
GFCI, AFCI, and dual-function protection
Older homes typically didn’t have ground-fault circuit interrupters (GFCIs) or arc-fault circuit
interrupters (AFCIs), but current codes increasingly require them in many locations.
-
GFCI: Detects differences between hot and neutral currents and trips quickly to
reduce shock risk, especially near water (kitchens, bathrooms, garages, outdoors, laundry). -
AFCI: Detects dangerous arcing conditions that could start fires, often required
in living spaces and bedrooms. -
Dual-function breakers or receptacles: Combine both protections in a single device
for better coverage.
Many homeowners upgrade old circuits specifically to add GFCI and AFCI protection, especially
during kitchen and bathroom remodels or panel replacements.
Planning an Electrical Installation in an Old House
A successful upgrade starts with a plan, not a random shopping trip for breakers and boxes.
Step 1: Evaluate the existing system
A licensed electrician or electrical inspector can:
- Assess panel capacity, grounding, and bonding
- Identify unsafe wiring (e.g., brittle insulation, aluminum branch circuits, knob-and-tube)
- Check for overloaded circuits and missing GFCI/AFCI protection
This evaluation often includes a formal home electrical inspection, which walks through the
service entrance, panel, circuits, outlets, and safety devices.
Step 2: Design the new circuits
Electrical design looks at both present and future needs. You’ll plan dedicated circuits for
major appliances (range, microwave, dishwasher, laundry), ensure adequate lighting, and consider
extra capacity for EV charging, home offices, or a workshop down the road.
The goal is to distribute loads so you’re not running half the house off one overworked breaker.
Modern wiring guides emphasize balancing circuits, avoiding daisy-chained “octopus” outlets, and
providing enough receptacles to minimize extension cords.
Step 3: Permits, then rough-in
Once the plan is ready and permits are approved, rough-in work begins:
- Drilling holes through framing with proper edge clearances
- Routing cables neatly and securing them with staples or straps
- Using approved junction boxes and respecting box-fill limits
- Protecting cables with steel plates if they pass too close to the face of studs (usually closer than 1 1/4 inches)
Careful routing prevents you from accidentally drilling into concealed wires latersomething that
can cause shocks, fires, and very awkward calls to the electrician.
Step 4: Devices, fixtures, and testing
After inspection approves the rough-in, you’ll:
- Install tamper-resistant receptacles where required by code
- Use proper terminations (screw terminals, not loose backstabs) for long-term reliability
- Connect fixtures with correct grounding and support
- Test GFCI/AFCI devices with their built-in test buttons
At the panel, breakers are installed, circuits are labeled clearly, and the system is tested for
proper polarity, grounding, and functionality.
Common Electrical Installation Mistakes (and How to Avoid Them)
Even well-intentioned DIYers can create dangerous situations. Some of the most common mistakes
flagged by electricians and inspectors include:
-
Using the wrong wire type or gauge: Undersized wire on a larger breaker can
overheat and cause fires. -
Cutting wires too short: Leaves no slack for safe splicing or future repairs,
often forcing poor connections. -
Inconsistent color coding and no labels: Makes future troubleshooting confusing
and risks reversed polarity or miswired circuits. -
Connections outside junction boxes: Open splices in walls or ceilings are a
major fire and shock hazard. -
Ignoring GFCI/AFCI requirements: Leaving kitchens, bathrooms, or bedrooms
unprotected increases shock and fire risk. -
Running cords under rugs or furniture: Hidden cords can overheat or get damaged,
which is why home safety experts warn against this decorating shortcut.
The fix? Respect the code, use the right materials, and when in doubt, bring in a professional to
review your work.
When to DIY and When to Call the Pros
Some tasks are reasonable for cautious, informed homeowners:
- Replacing a light fixture on an existing, properly wired circuit
- Swapping out a standard receptacle for a GFCI (following instructions exactly)
- Changing switches or installing basic dimmers (rated for the load)
But panel upgrades, new service installations, aluminum wiring corrections, and major rewiring
should be handled by licensed electricians. These jobs require in-depth code knowledge, specialized
tools, and close coordination with inspectors and the utility.
Also, if your home still has an old fuse box, non-grounded outlets, or mixed-and-matched wiring
from multiple decades, that’s a strong signal to bring in a pro for a full evaluation and
upgrade plan.
Living Comfortably With Your New Electrical System
Once the new installation is complete and inspected, a little maintenance goes a long way.
- Label every circuit clearly and keep an updated panel schedule.
- Test GFCI and AFCI devices regularly using their test buttons.
- Consider whole-house surge protection at the panel to protect electronics and smart devices.
- Keep records of permits, inspections, and any major electrical work.
Modern wiring standards emphasize surge protection, emergency disconnects in accessible locations,
and comprehensive GFCI/AFCI coverage to keep systems safer and easier to service.
The result is a house that feels just as cozy and historic as everbut behaves like a modern home
behind the walls.
Real-World Experiences: Lessons From Old-House Electrical Upgrades
Talk to anyone who has renovated an old house, and you’ll hear at least one “electrical surprise”
story. These real-world scenarios highlight why thoughtful electrical installation matters so much.
The mystery tripping breaker
One homeowner kept losing power in the living room whenever the toaster and microwave ran at the
same time. At first, they blamed the appliances. After an electrician investigated, they discovered
that half the kitchen and much of the living space were on a single, overburdened 15-amp circuit.
During the upgrade, the electrician split the loads into multiple 20-amp circuits, added GFCI
protection in the kitchen, and labeled everything clearly. Suddenly, the home functioned better:
breakers stopped tripping, lights stopped dimming, and the homeowners stopped playing “breaker
roulette” in the basement.
The hidden knob-and-tube surprise
Another family bought a charming early-1900s house with updated outlets and switches. Everything
looked modern from the outside. But when a ceiling was opened for a new light, the contractor found
original knob-and-tube wiring spliced into newer cable inside the ceiling cavitywithout a junction
box.
That discovery triggered a larger investigation. Behind finished walls, multiple generations of
wiring were tangled together: cloth-insulated cable, old splices wrapped in brittle tape, and
circuits with no equipment grounding. The solution was a staged rewiring project with permits and
inspections at each phase. It wasn’t glamorous, but it dramatically improved both safety and
reliability.
The “no permit, no coverage” wake-up call
A homeowner decided to DIY a detached-garage subpanel and a few 240-volt circuits for tools. The
work looked neat and tidy, but no permit was pulled. Months later, a small fire started in a
junction box where connections were overloaded. The insurance company sent an investigator,
discovered the unpermitted work, and used that to limit coverage.
After that painful lesson, the homeowner worked with a licensed electrician, pulled proper permits,
and rebuilt the system to current code with correct wire sizing, grounding, and overcurrent
protection. The second time around, the inspection process was actually reassuring: a neutral third
party verified that the work was safe.
The joy of a well-labeled panel
On the positive side, there’s the homeowner who went from a chaotic, half-labeled panel to a
beautifully organized one during a whole-house upgrade. Circuits were grouped logically (kitchen,
lighting, bedrooms, HVAC), breakers were clearly labeled, and a printed schedule was taped inside
the door.
That small upgrade in organization made everyday tasks easier: no guessing which breaker controls
the bathroom lights, no flipping ten breakers to shut off a single room. During future projects
(like adding a car charger), the electrician instantly understood the system. Good labeling may not
be glamorous, but it’s the kind of long-term usability that separates a so-so installation from a
great one.
What these experiences all have in common
In every story, the turning point came when someone treated electrical installation as a system, not
just a collection of wires. Planning circuits, respecting permits and inspections, using modern
safety devices, and documenting the work transformed old houses into safe, efficient, and
comfortable homes.
Whether you’re renovating a 1920s bungalow or updating a 1970s split-level, the same core ideas
apply: design thoughtfully, build to modern standards, and never ignore what’s happening behind the
walls. That’s the real spirit of “This Old House”keeping the character, but upgrading the wiring
so your home can safely handle the next few decades of life, gadgets, and maybe one too many string
lights on the porch.
Conclusion
Electrical installation in an old house is much more than swapping a few outlets. It’s about
creating a safe, code-compliant system that can handle modern living while preserving the charm
that made you fall in love with the home in the first place. With careful planning, the right mix
of professional help and DIY tasks, and a healthy respect for permits, inspections, and safety
devices, you can turn a quirky old electrical system into a quiet, reliable backbone for your
everyday life.